This temperature controller is realy good stuf , have LED display,probe and another plus. I buy and sell cca 30 pcs , all the pieces come in order and yet there was no complaint.In my review you see pros and cons, detailed instructions how to plug and set this device with technical parameters.
Now I am describing my experience with the XH-W1209 thermostat, I tested about 380 only two pieces have bad display did not show one digits, but functionality is OK.
Its bigger post please use navigation menu for quick move:
Temperature controller can buy from Ebay or AliExpress, good price varies around about 3-6 usd shipping included.Keep in mind that at low cost 3-4 usd sell thermometers not temperature controllers but the XH-W1209 is very cheap
I buy from “Ketoo Store” from aliexpress, shopping’m over 20 times and goods always come right. Delivery takes 12-16 days:
Missing housing, the possibility of short circuiting when handling bad
Temperature sensor could be longer, sensor is 30 cm long I would welcome about 1 meter
I not see in market fahrenheit verziu or 220V/110V can buy only 12V DC celsius version
When mounting the panel may have trouble relay and terminal board is higher than the display and buttons
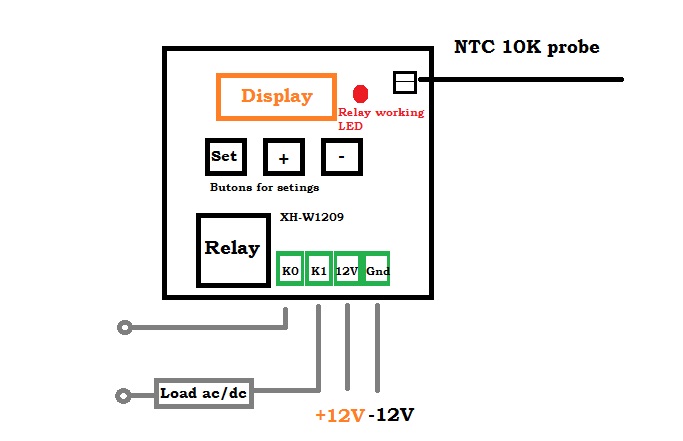
Detailed description of temperature controller XH-W1209
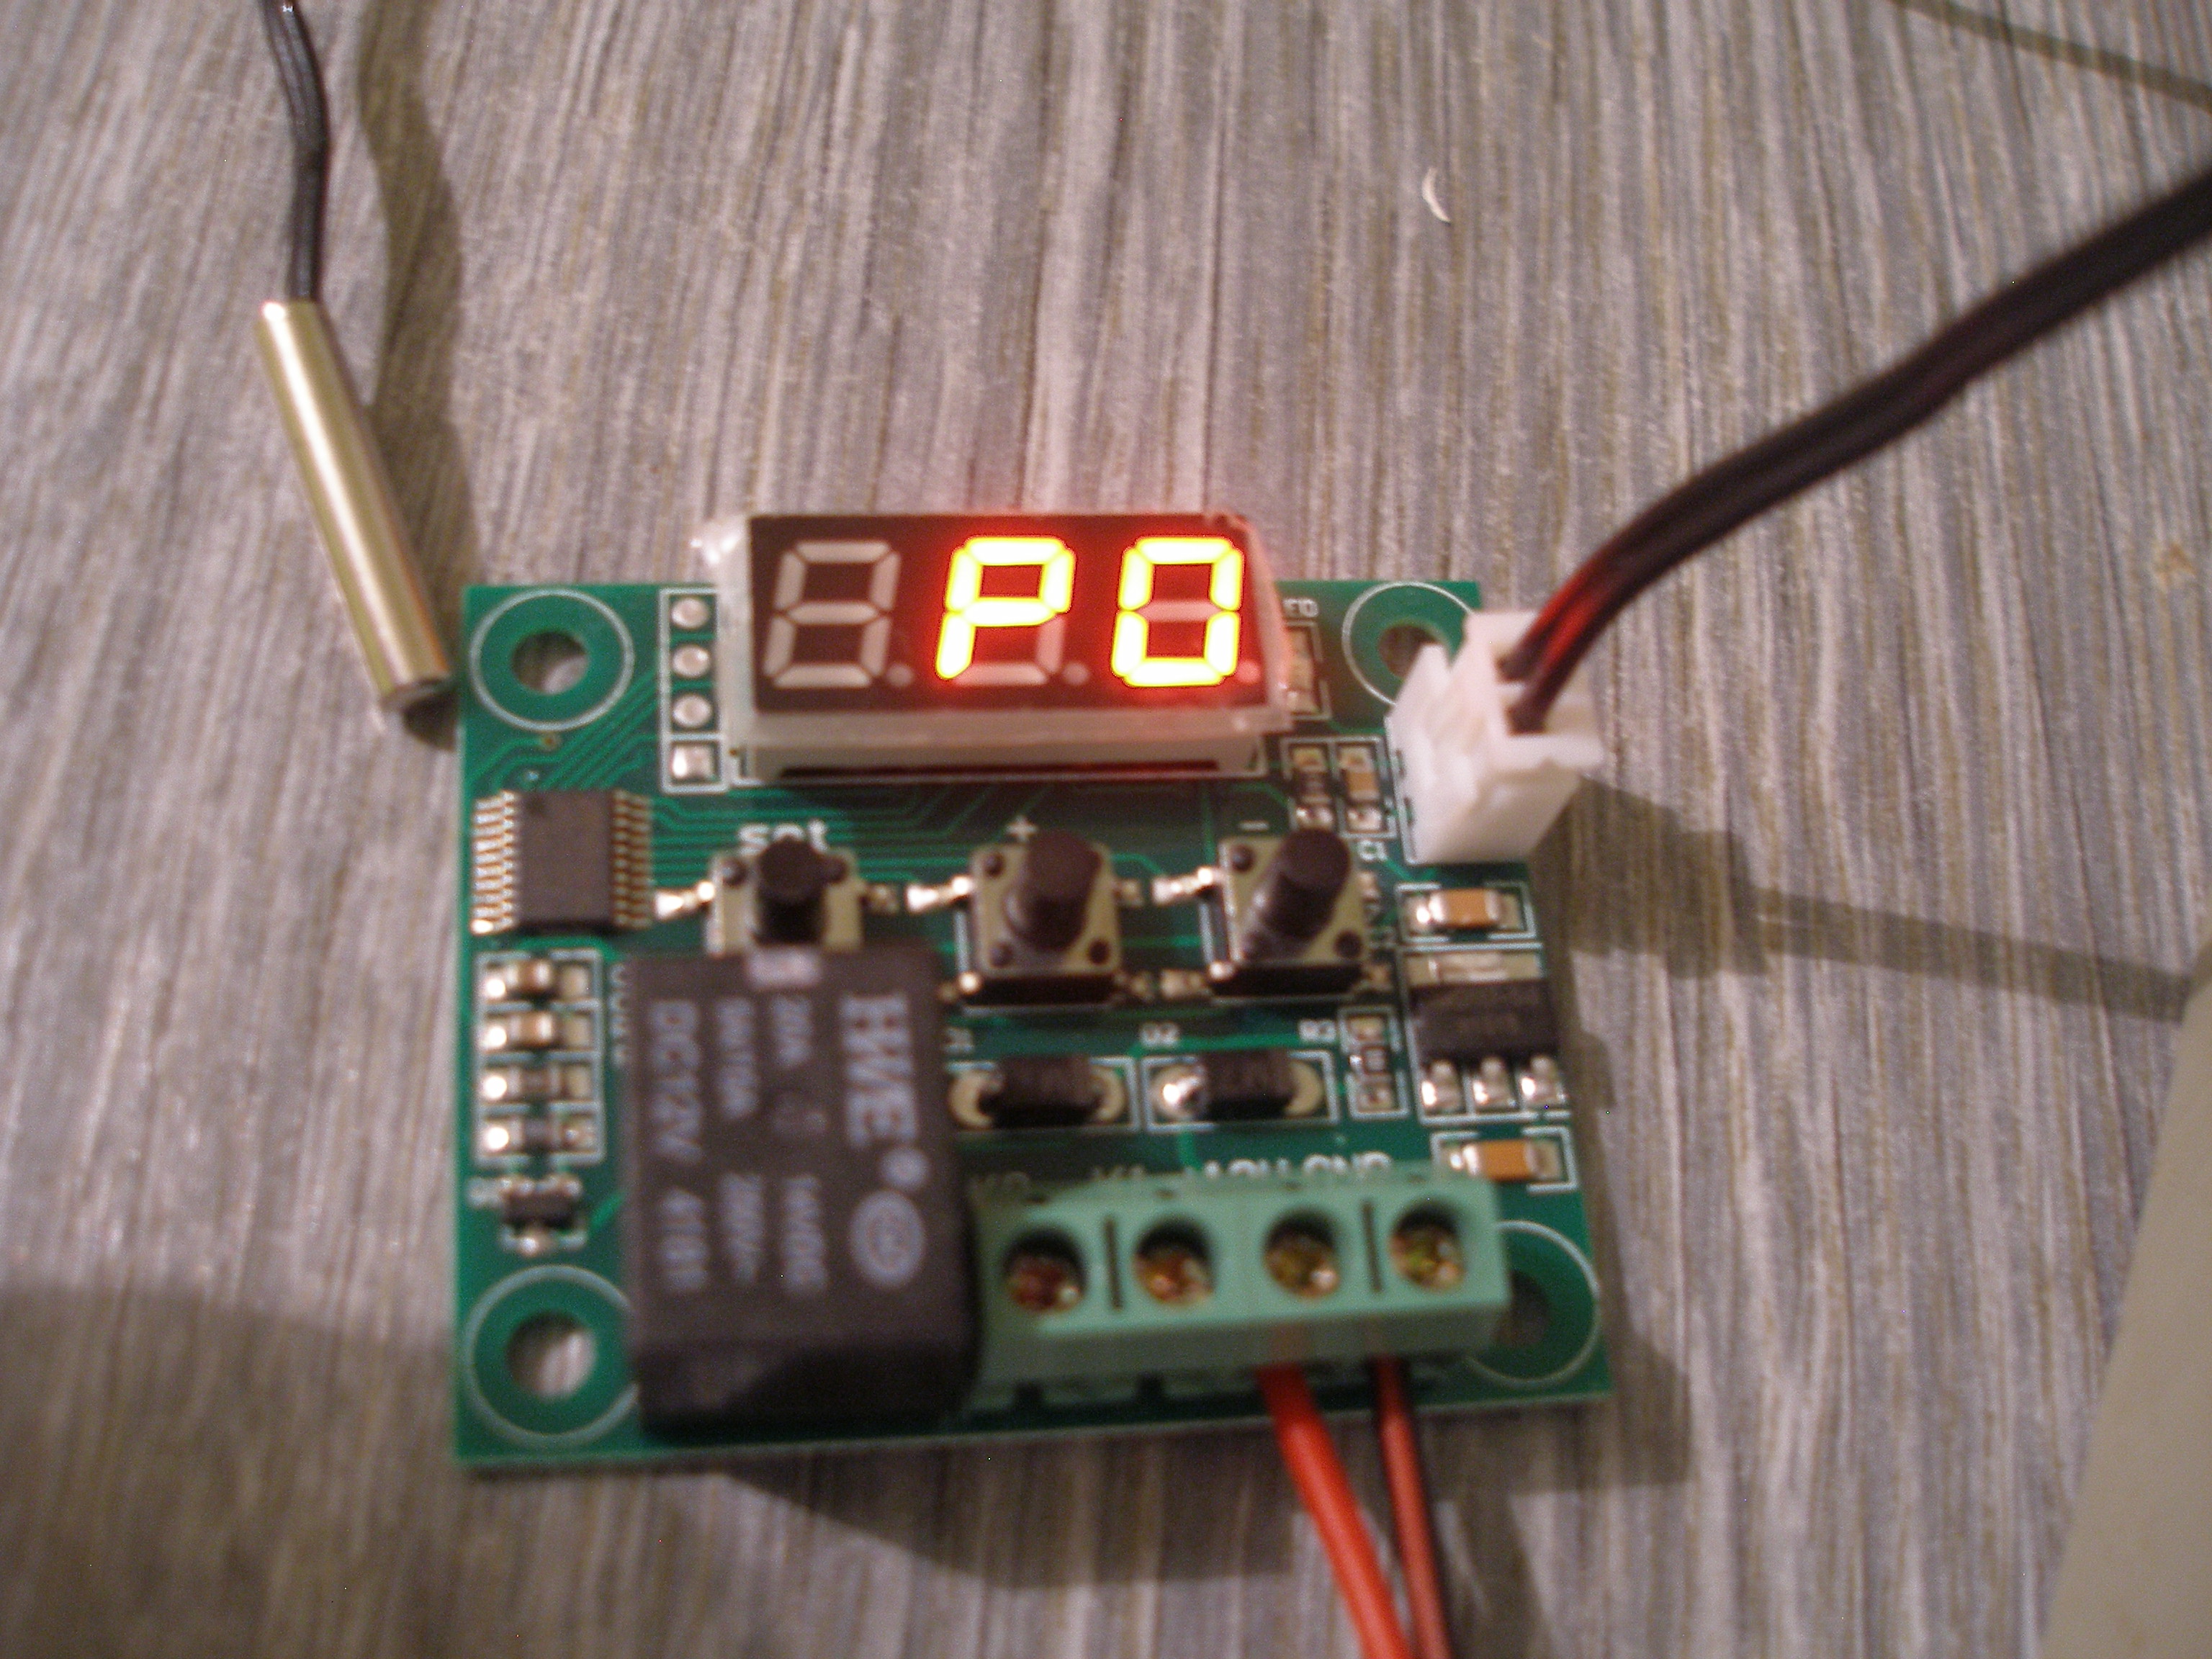
Now I will describe thermostat and control , i will try to describe accurately.The device XH-W1209 includes five main components:f
The display is red, it shows three digits, the amount of 1 cm and length of 2.3cm.Clearly shows the temperature value withe the one decimal place.
Below the display are three buttons which control the thermostat XH-W1209. First buton is “SET” with next two buttons are + and – are used for menu navigation increasing or decreasing values
Below the buttons is black one way relay to turn on or off an electrical circuit.Seller uses the value of 10 amperes, 250 volts. The relays can switch from AC circuits suitable for US 110V or EU 230V.
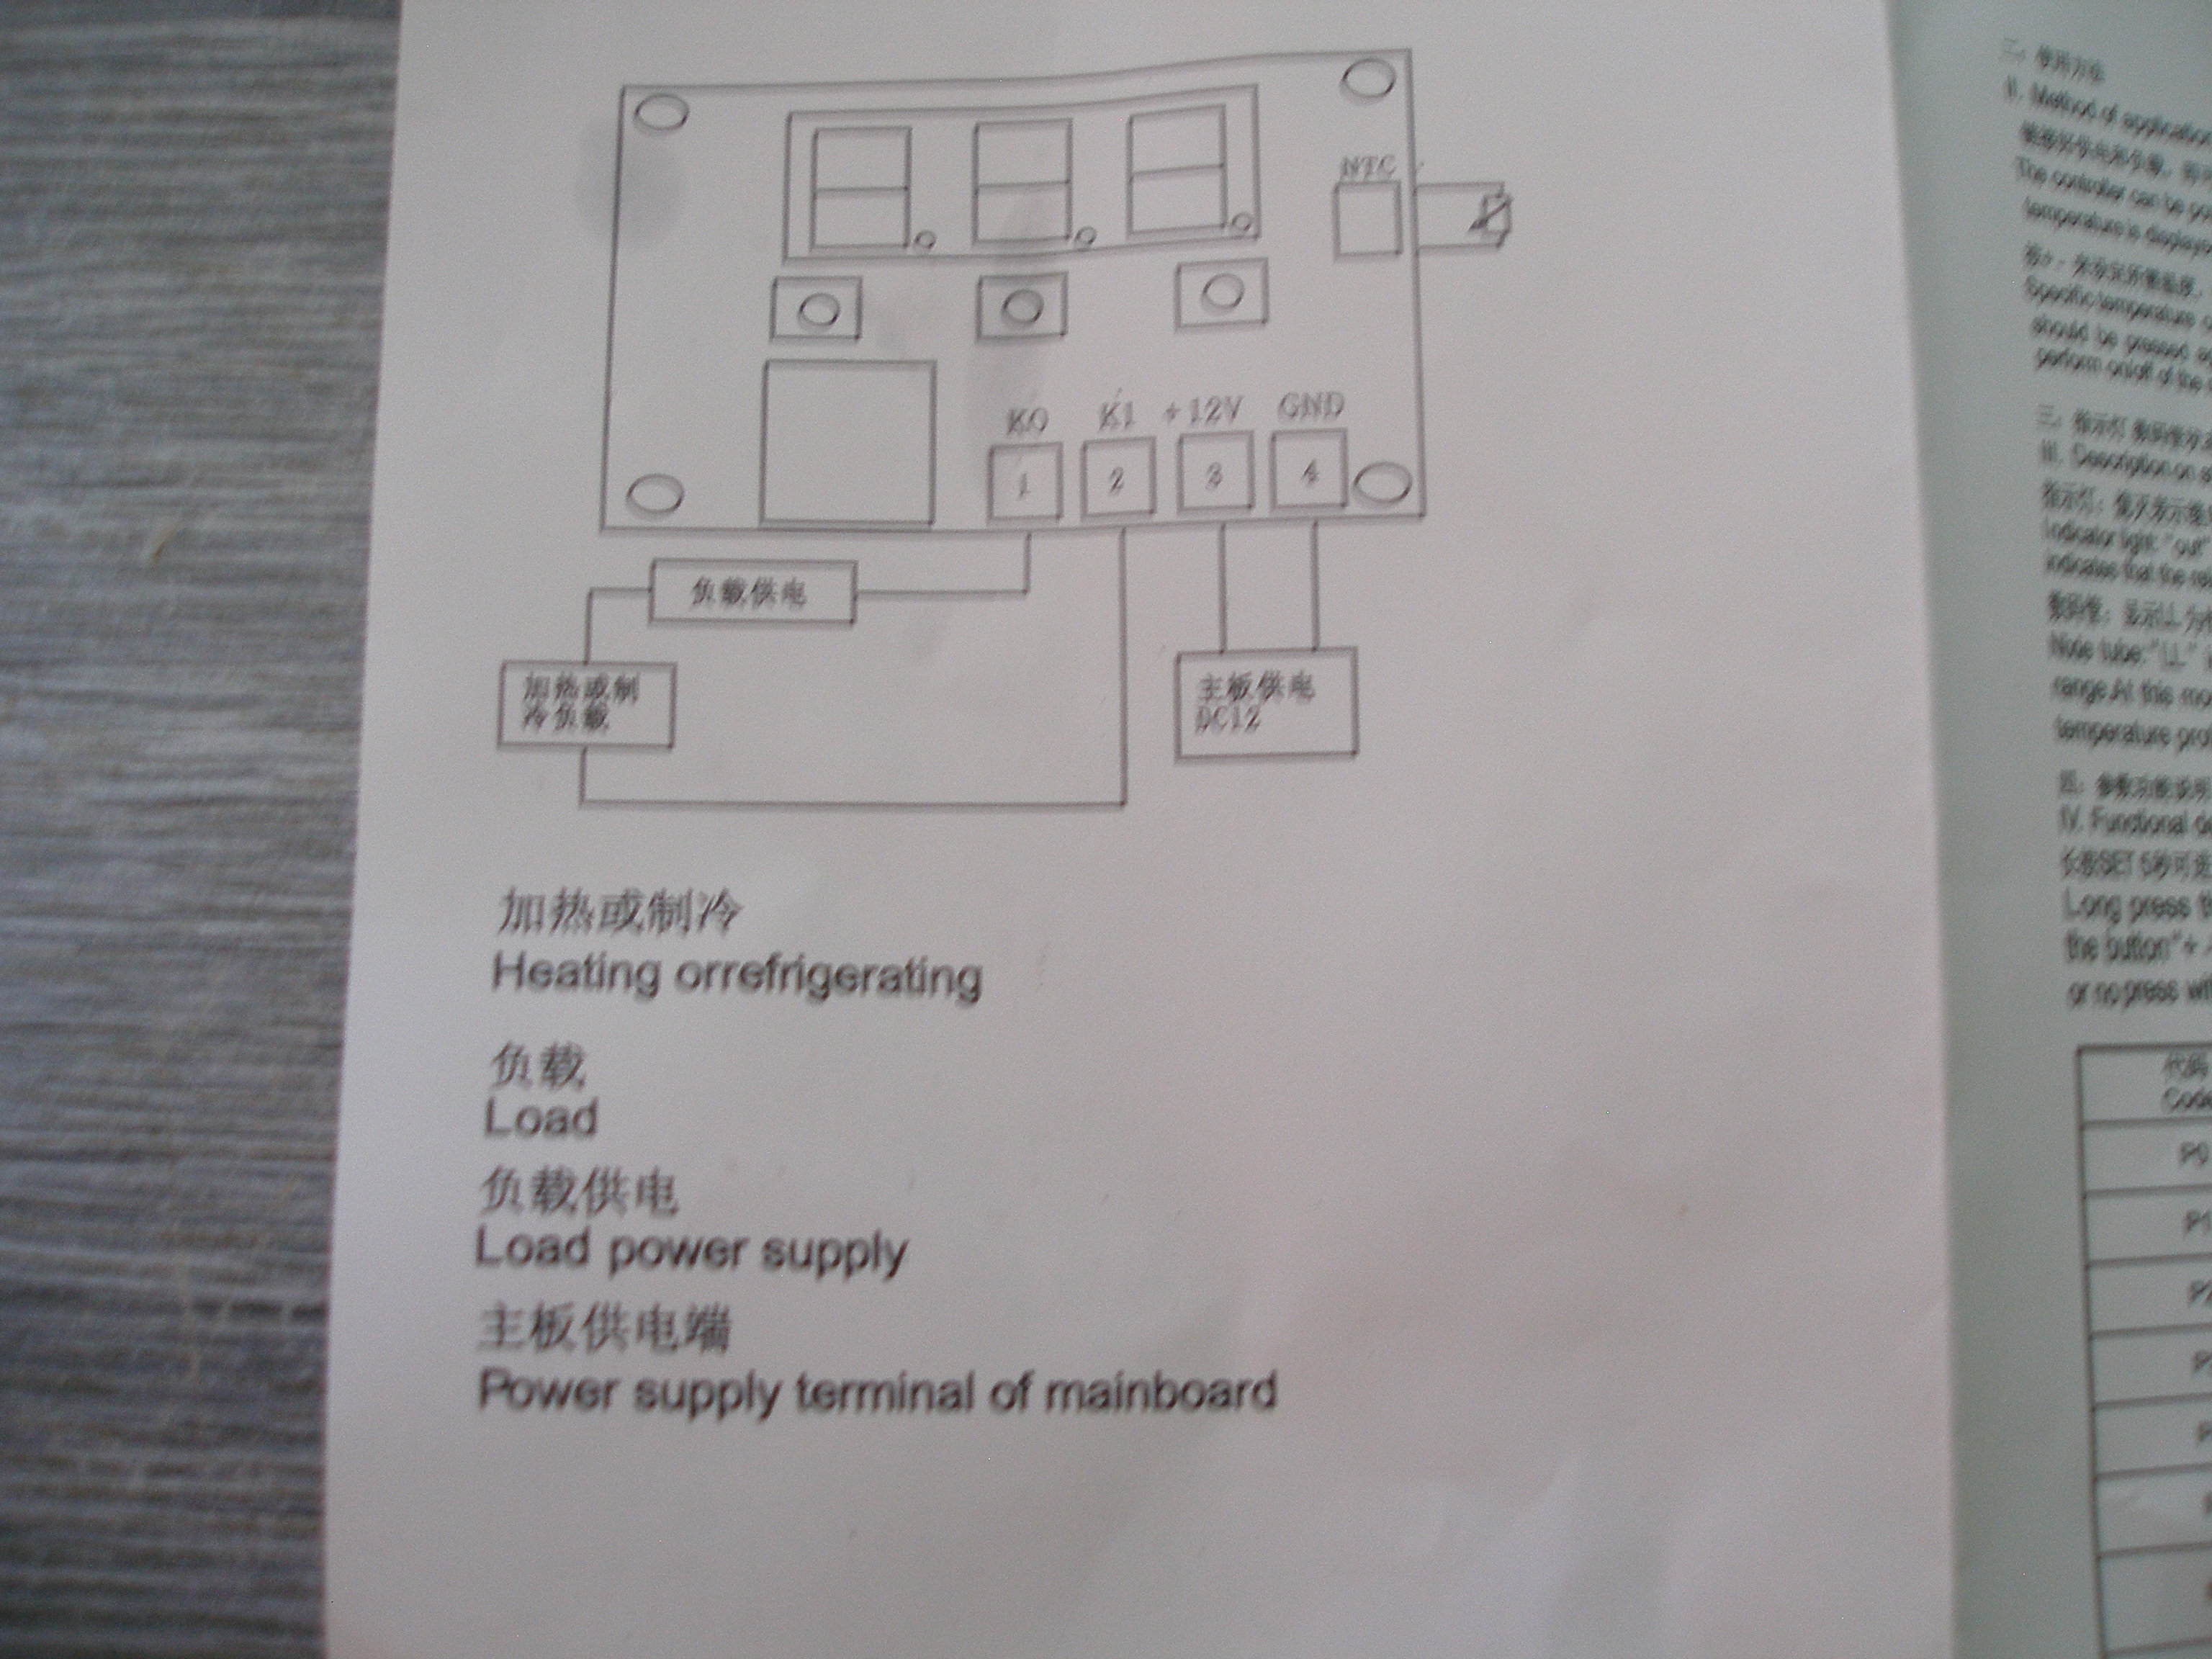
Do we involve green terminal two terminals for the relay K0 and K1 and two terminal for power from 12V transformer or battery + 12V and GND.
The sensor for the temperature controller XH-W1209 is placed in a simple white socket.It is about 30 cm long with active iron end.Type of temperature sensor is clasic NTC 10K 0.5% .
Short video about temperature controller:
Functions and settings of the thermostat
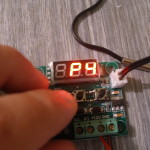
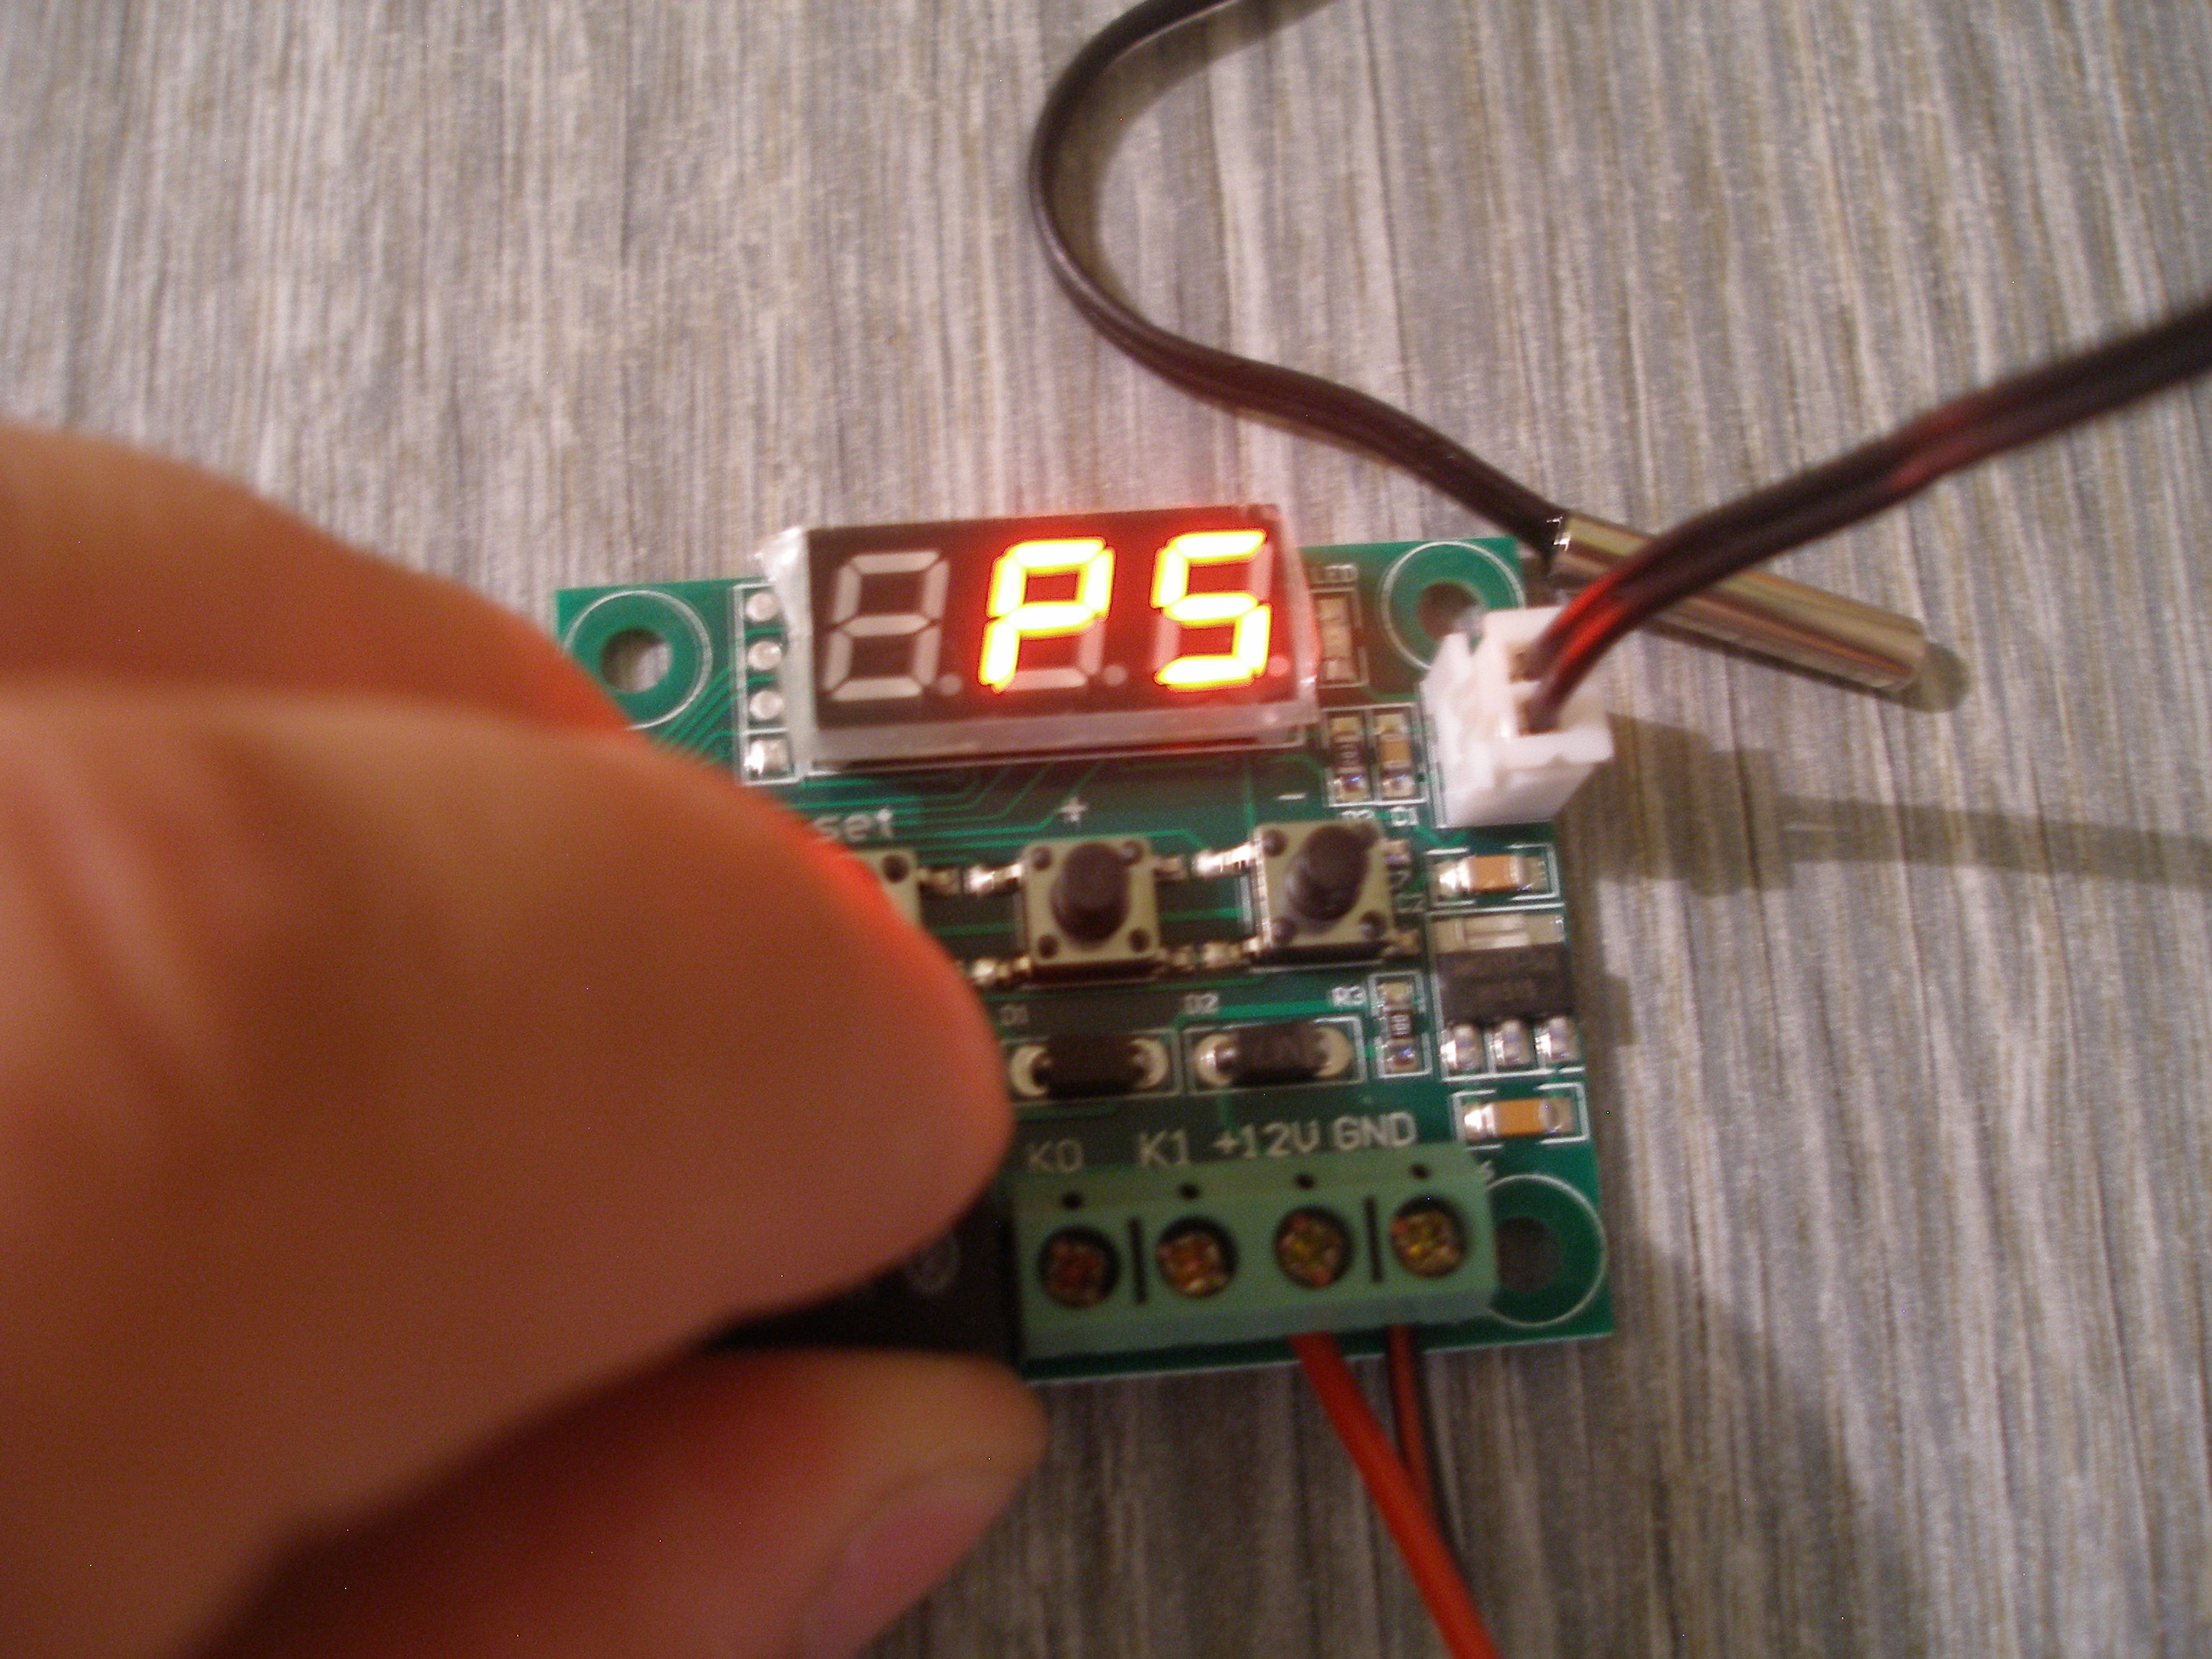
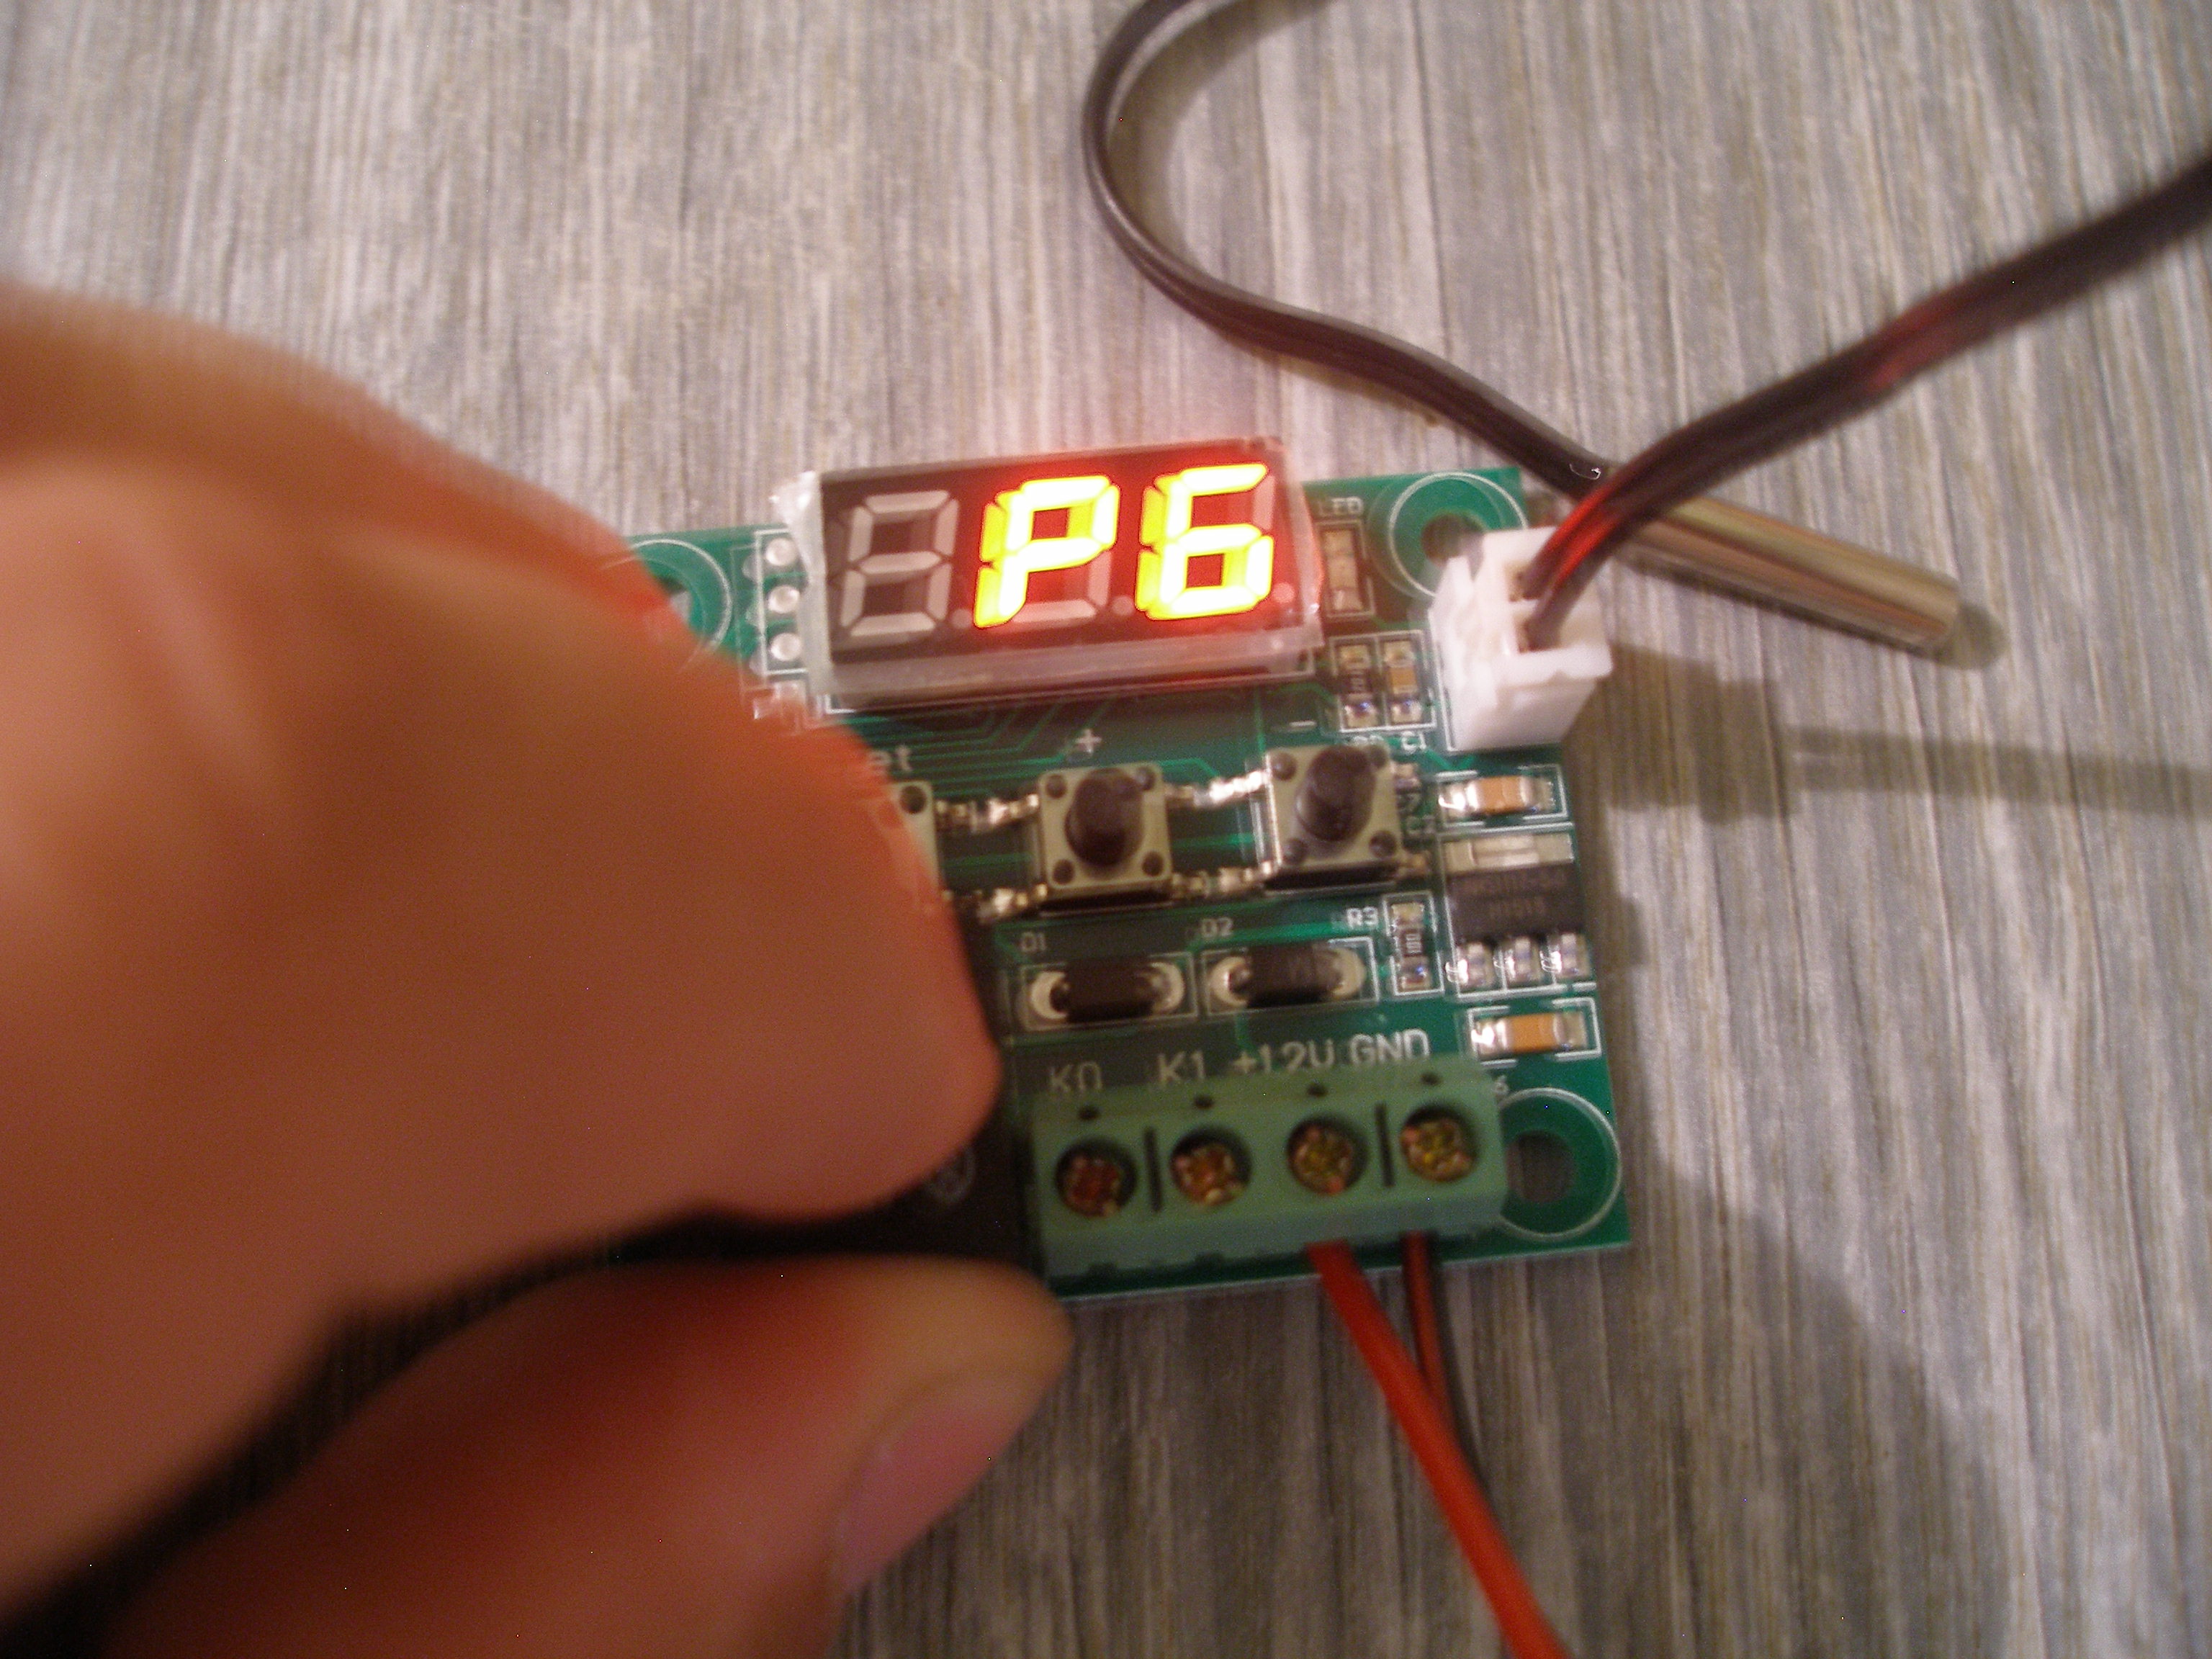
At the beginning it is good to introduce thermostat control for easy work. The XH-W1209 has three control buttons on the SET, + and -.If you press the SET button for 2 seconds enters the menu with seven options for setting the thermostat (P0,P1,P2,P3,P4,P5,P6).
Here is basic schematic for temperture controller XH-W1209
In the temperature controller XH-W1209 menu will move with buttons + and – to select the value or raising or lowering the temperature.
The red LED display indicates when the relay is activated.Always shines as long as the relay is activated.If the relay is switched off LED off.
PO Heating or Cooling ?
Here we set the temeperature controller operation mode C- cooling , H-heating.
If you set Cooling (C) temperature controller will be activated relay when temperature falls to the setpoint.
If you set Heating (H) temperature controller will be activated relay when temperature raise to setpoint.
P1 – Hysteresis or Return diference set
This device model can value set by 0.1C and the lowest value is 0.1C.This is a very useful feature for precise operation of the temperature controller.For example, if you set the value of 1C and the desired temperature on the thermostat 20C relay will be deactivated at 21C (20C+1C). The relay is activated again when the temperature drops to 20C.
P2 – Highest temperature limit
You can set a maximum temperature limit, less than 110 degrees.
P3 – Lowest temperature limit
You can set minimum temperature limit more as 50 degrees.
P4- Temperature correct or calibration
Very good feature that lets you set your thermostat by certified accurate thermometer.
If you do not have a certified thermometer leave the value at 0C. Calibration allows you to adjust the temperature in 0.1 increments.
P5-Delay starting time
In this step, you set the start delay in minutes 1-10 min.If you set 1min relay is activated until one minute after reaching the set temperature.
P6-High temperature Alarm
The menu P6 initially turns OFF to ON and press the SET,then set the temperature at which the alarm is activated. When is alarm activated display not showing temperature only – – -.
Other info
The device has a low consumption of 25-35 mA at rest 50-75 mA when the relay is activated.
Be careful if the power supply voltage lower than 10V relay is not activated although the LED shining.
Complete technical parameters of temperature controller XH-W1209:
Control range: -50*-110 degrees Celsius
Resolution: the -9.9-99.9 of 0.1 degrees Celsius, 1 degrees Celsius temperature section of the other
Accuracy of temperature: 0.1 degrees
The control accuracy: 0.1 degrees Celsius
Return difference accuracy: 0.1 degrees Celsius
The refresh frequency: 0.5s
High temperature protection: 0-110 degrees Celsius
Input voltage: DC 12V
Measurement of the input: NTC (10K 0.5%) waterproof type sensor
Power consumption: static current: <=35MA operating current: <=65MA
Display type: 0.28 inch three digital tube
Short manual again:
Connect the power supply and the negative,
Can provide power supply controller for temperature measurement, displayed, press the SET key once, display temperature scintillation,Press +- to set the desired temperature, the setting is finished,
press SET as confirmed return,This controller according to the set to automatically perform the relay on-off. The temperature controller output for the 10A relay, to meet a variety of high power load, please ensure that the wiring is correct.
Indicator lights, digital tubes state description:
Indicator: put out the said relay disconnected, ofen light said the relay is closed,display HH for exceeding the measurement range,the thermostat will force disconnect relay;display – for high temperature protection.
Wrong! James is correct: I use one for a freezer control unit (“C” mode), and when the temperature rises above -18 deg Celsius, the relay kicks on, the switch is closed, the compressor turns on, the evaporator coils cool, and the temperature in my freezer once again drops!
Exactly, I spotted that also right away. Instruction should read:
“If you set to Cooling (C), temperature controller will activate relay when temperature rises above the setpoint.
If you set to Heating (H), temperature controller will activate relay when temperature falls below setpoint.”
Simple: when you want to cool, something should start when it gets too hot; when wanting to heat, something should start when it gets too cold.
But besides this small detail, kudos to Ivar for this post – mine also came without instructions (but for that price, who can complain?).
Does it keep the set values in memory when 12v power is removed?
So if 12v power supply comes from solar panel it will come and go.
Will this device work as set when power returns?
Easy mounting upgrade:
I removed the terminal strip, the thermal sensor connector and the relay. I then turned the board over and
placed the relay over and marked where to drill the hole to allow the relay to be mounted on the back of the
board, scrap the coating off the front of the board around the new hole , set & solder the relay, the terminals
and the sensor connector. Now you have nothing taller than the switches & display on the front of the board.
What I want to know is , what is the function(s) of the four solder pads just to the left of the display.
It appears to be for a connector, One is ground the other three go to the microprocessor (extra switches/ functions?) Is it possible to download the code from the chip, or even change it?
The pads are the programming interface for the STM8F003 microcontroller (8K Flash, 1K RAM, 128Byte EEPROM). By the way, all the development tools are free, and WS1209 is maybe the cheapest complete microcontroller board on the market today.
Thomas, you could have saved yourself the trouble. Here is the circuit 🙂 http://images.ua.prom.st/203440504_w640_h2048_w1209_shema_el__ipialnaya..jpg?PIMAGE_ID=203440504
Hello,
what I’ve seen :
If I number from top to bottom
Pin 1 is the GND
Pin 2 got to pin 4 , ic STM8S003F TSSOP20 = NRST Reset
Pin 3 go to pin 18, ic STM8S003F TSSOP20 = PD1/SWIM Interface to Debug or Programming
Pin 4 go to +5Vdc.
It seams to be the programming connector. I’ve also tried to find the source code, but without success up to now. Would be interesting to have a personal setting that allow to have controller from 0 to 999°C for example or regarding different sensor type.
Bricola, by convention, “pin1” is the square pad (and that’s +5V, check my pastebin snippet). I also described the analogue input network. With an NTC you’re limited to -50 to +150 degree, but the resolution and accuracy will be limited by (the lack of) analogue signal conditioning, no voltage reference, and the low-spec 10 bit ADC.
I doubt that you’ll find source code, but hacking is fun – roll your own.
i use this equipment as thermosat of radiator fan .
i set temp at 80
at the beginning, it work well.
but now lcd displaying — and relay activated. it didnt change even temp down to 26.
when P0 set to “H”, and relay not activated but lcd still displaying — .
I need to check the temperature for XX min ( say 20 min ) and if the Temp didn’t reach to the set value in XX min ( say 20 min ) , i need to operate a heating element .
I found the online instructions for this board a bit confusing.
When you power on the board, it displays the current temperature. Press the SET button to set the temperature at which the relay will switch on.
In addition to simply setting the temperature at which the relay turns on your device, you can set nine parameters that are not apparent to a casual user. These are labeled P0 through P8. To access these options, press and hold the SET button for 5 seconds.
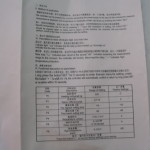
Code Indication Set range Inital Setting
P0 Cooling/Heating H/C C
P1 Hysteresis 0.5-15℃ 2
P2 High limit 110℃ 110
P3 Low limit -50℃ -50
P4 Temp. adjust -07 to 7℃ 0
P5 Delay start time 0 -10 min. 0
P6 Alarm on/off on
P7 High temp. alarm 0 -110 ℃ off
P8 Initial setting on/off off
Detailed instructions:
Press SET for 5 seconds to enter the main menu settings.
Press the + or – button to cycle through registers P0 – P8.
Press SET again to view the stored value.
Press + or – to change the stored value.
Press SET again to save the new value and return to the P0-P8 list.
The controller will return to normal mode if no button is pressed for 10 seconds.
P0 – Sets cooling vs. heating mode.
– In cooling mode, the relay engages when temperature rises past the set point.
– In heating mode, the relay engages when temperature decreases past the set point.
P1 – Hysteresis (return difference)
– Hysteresis is the difference in temperature between when the relay engages and when it shuts back off.
– This keeps the relay from constantly cycling on and off with small changes in temperature.
Example: You want to turn on a fan when the temperature rises above 30 degrees. If Hysteresis was set to zero, the fan would come on at 30C, turn back off at 29.9C, and then back on at 30C – constantly cycling your load. With hysteresis set to 2, the fan will come on at 30C, turn off at 28C, and then come back on again at 30C. This gives your fan a chance to adequately cool the device you are measuring.
In heating mode, the fan would come on at 30C, turn off at 32C, then on again at 30C.
P2 – Maximum temperature a user is allowed to set.
P3 – Minimum temperature a user is allowed to set.
What confused me in the Chinese instructions:
P2 and P3 do NOT set the relay control point. These parameters set the temperature limits displayed to your end user when they press the SET button. This lets you limit the temperature range your end user can control.
For example, you may want to limit your end user to only control the temperature of a cooler between 0C and 10C. Set P2 to 10 and P3 to 0. When your end user presses the SET button, they can only change the setpoint between 0 and 10.
P4 – Temperature correction/calibration
Use this to correct the temperature displayed by this unit when compared to a calibrated thermometer of known value. This setting can usually be left at the default value of 0C. An offset of -7C to +7C can be applied to the displayed temperature value.
P5 – Delayed start time. Unit = minutes from 0 to 10. Set to 0 to disable.
Delay relay operation on initial power-up by this number of minutes. This can help provide time for compressor delay, temperature stabilization, etc.
P6 – Key tone switch (Note: This setting does not work on my W1209 Ver 1.2)
P7 – Temperature alarm
On units with a buzzer, this setting triggers an audible alert. In cooling mode, the alert sounds when the measured temperature is at or below the value set in P7. In heating mode, the alert sounds when the measured temperature is at or above the value set in P7.
P8 – Restore factory settings (Not working on my W1209 Ver 1.2. Toggles between C & H)
@Thomas @edwin
I want to modify the source code so that P5 will set(also) the delay between Relay OFF and ON.
I have seen the pin configurations, but not able to find help on how to download, modify and upload the source code to STM8.
The W1209 firmware is read protected. Even if you could read it there is no source code in the chip, only machine code. Maybe you find a website in China where you can download the source code, but I don’t think so. Your best option is to write a new software.
sir,
I purchased XH-W1209 with display and probe from ebay.in. In my module only P6 programs are there.
It does not have speaker or buzzer..
P6 is working .
Now I need your help,
how and where to connect buzzer?
The relay in current units I got is a normally closed contact – contacts close on loss of power or over/under temperature settings [register LLL or HHH on display]. Units work well with P0-P5 settings… NC contact was a surprise as when relay actuation light is on the contacts are OFF.
dear sales group
Good moorning
we’re so happy and pleased to send this e-mail to you , and it is a great honor to communicate and deal with you .
we need good temperature control model w1209.
we’d like to receive detailed prices to Egypt .
we’ll get one instrument of your products as a demo .
we’ll experience and test these instruments in Egypt .
If we found your products are good , work efficiently and have quality assurance , we’ll advertise these products and instruments in our country Egypt and other neibouring countries which we deal with .
If that , we ‘ ll import your products and open the door of trade dealing with you .
To conclude , we want to say we hope to cooperate and communicate eachother . That’s all for now ,
thanks
Sales manger
00201110049577
my controller’s display is not showing any thing and the relay is ON. this happened after it exceeded high temperature. I had reset the power many times but I cant see the display . Is there any hard reset system for this unit.
Thank you for posting. I am looking at the electrical diagram. I understand we are using to 12 volts to power and we are turning on a relay (as indicated by the LED) depending on if we have it for C and temp gets higher or we have it set for H and the temp gets colder. Can you go into a little more detail on K0 and K1? Thanks Tom
Temperature controller close (and open) K0-K1 terminals
if you have C if reach critical high temperature k0 and k1 terminal close = start refrigeration
if you have H (heating) reach critical low temperature k0 and k1 close = star heating
Hello dear Ivan, first of all, I would like to thank you for this magnificent complete guide and for the time spent in preparation of the guide. All this for shared with us (the world) so thank you again for sharing. I ordered a model W1209 for a small beverage fridge, thermoelectric semiconductor, nominal voltage: 220V – Nominal input: 60w – Nominal frequency: 50Hz – Storage volume: 20 L. My question, Installed the W1209 to replace Manual thermostat button? Thank you in advance and I apologize for the inconvenience of my adventures, thank you.
The thermostat has a memory if you remove the buttons the settings remain stored. But if you want to move the buttons, the soldering is difficult, the circuits are corrupted .. I propose to connect the wires to the buttons and then connect them where you want
Hi Ivan, The translator has mal translated my request, sorry, I wish as you say connect the wires to the buttons, then connect them to the fridge, here is a photos of the manual thermostat,
And finally I own an adapter from 3 to 12V I do not know if I would need?
Sorry i cannot help with thermostat .. from fridge
But in
in SSR relay can switch more load (curent) , if you feeding (control 4 and 3 ) from this transformer and regulate by xh-w1209 relay switching..
Thanks for the info Ivan, during the purchase of the W1209 I noticed the different notes on the relays, I do not know if identical just the notes that changes? I ordered 3 cheap. Thank you again for all the advice and help, I’m talking about your site in France, very appreciate, thank you.
Thermostats are manufactured by several factories, over 5 Amps I would consider over the solid state relay, especially if they frequently switch and switch off
Thank you Ivan for its precisions, finally I will use a thermostat MH1210W for the refrigerator, I think more suitable, just one last issue, Ivan, to power the W1209 requires an adapter, that is ok, I see indicated on the relays Of the W1209 in general 20 Amperes, can I use a socket (max 220v 5 amperes) and powered hot or cold without transformer or relay ssr …? Example I plug the power supply 12V of the W1209 and use K1 and K2 to install a small 12V fan with red and black fan cable? Thank you Ivan.
MH1210W – is good choice
Xh-1209- can use for fan ..
220V 5A You do not need to use the ssr relay.
Dear Ivan, you are a generous man, fabulous, thank you for all, your guides are perfect, I wish you all happiness, thank you and great respect IVAN, great greeting of France.
Hello from France, dear Ivan, I wanted to share the result, it works perfectly, I have the model from P0 to P8, the other 2 are P0 to P6, so in the end its walk very well, thank you and happiness for you.
Hello Ivan, your presentations and instructions on electronic products are very appreciable, thank you for all this long and precise work, I look forward to your guide W1209 P0-P8 and thank you very much in advance.
Hi. I could not understand the translation from the chinese manual. All I need is to have the relay activated when the temperature reaches 55° and deactivated when it drops 45. Can you help me?
U muss simulate on my xh-w1209 temperature controller , but you setings P1 -C cooling and P2 set 10C.. please check..
Attachment
Dear Ivan, thanks to your precious explanations I managed the assembly of the W1209 with a fan, I wanted to use another W1209 to power a 25W lamp, I drew a personal diagram for my understanding, the brown wires are the phase or The (Line) and the blue neutral, according to you, is my schema acceptable? Thank you in advance.
This mission accomplished, very good functioning, set on H for the warm works perfectly, the assembly was carried out on a W1209 P0 / P6, I remain integrated in a box and it is OK, thanks to you IVAN, very very large Respect IVAN thanks.
I thank you with all my heart, you are a genius, great respet and great hello of France, that your wishes realizes, that happiness is with you, thank you Ivan, very good weekend.
Hello Ivan, I hope that sava for you, I apologize for disturbing you but I can not find a solution, I had the idea to use a W1209 to control (if possible) a 2-channel relay module that Is powered 5V and has 2 output of 220V 10A, according to your knowledge of expert, would it be possible to control this module with the W1209? If OK, I would like to connect 2 sockets to control the temperature with the W1209 and activated or not the module in 5V so that the module actuates the relay (s) that actuates the refrigerator and a fan? It is a dream of amateur, if impossible to use the W1209 to control the module, I let fall my amateur idea, excused me disturbed you with my stories, thank you for giving me your opinion ‘For me) and thank you again for all your sharing
Hi Beckert , yes if w1209 give 5V to relay, can you source 2 channel relay module ,, but muss remove relay from pcb W1209 , this week i will test simmilar version of this temperature controlle i test it.. .
Hi evan pliz can you help me with the wiring of xh w1209 to a 12v heater and a 12v small fan. Where does ko and k1 connect to since the heater and the fan have only two wires the positive and negative which i will connect to the 12v power supply
Hello dear IVAN, thank you very much for your help of expert, you are a Genius IVAN, during my research I discovered the Arduino and I really appreciated this multiprogramme machine for ease use with relay, sensor, screen with But the MH series do very well the work and the program is already included, I think the idea of using The relay module with PCB W1209 is very good because no headache to realized a programming, all is already OK.Have the intelligence of deleted the relay of the W1209 to directly control the module is a genius intelligence, you are this genius IVAN , Thank you for sharing, I wish you good health and happiness, great thanks and respect
Hi, I’m having an issue with my w1209. I used this wire config and hooked it up to a fan, when it reached the temp it pulses on and off. I’ve played around with the settings and can’t seem to figure out what the problem is. Can someone help?
What is the load requirement of your fan/heater? Is your transformer able to provide needed amps? just a note, on your sensor calibration (p4) is it off that far? I used an old sensor had around and its off only -0.2. try unhooking terminal KO and see if it trips. Good luck.
I’m very concerned about the lack of function. Beckert says (on July 11, 2017 at 7:03 pm), that P7 and P8 are no longer included. I hope this is an error::>
I speak fluent hardware, but don’t do programming-although I can see the usefulness of the unit as a development platform.
35mA at 12DC is a lot of current. With the LED’s and the relay inactive, why does it use 35mA?? Shouldn’t it be closer to 35uA?? I understand the microprocessor has to do some real work because it has to constantly read the resistance of the temperature sensor…..but shouldn’t the unit wake up, check the temp sensor and then go back into deep sleep until it’s time to check the temperature again??? The vast majority of users could use the device if it only took one temperature reading in 30 seconds-so why waste the power?
I use mine to monitor and regulate the temperature of my cannabis nursery, and I can definitely get by with a single temperature sensing every 1 or 2 minutes.
Also, the unit shouldn’t have 12 volts applied because the 5 volt regulator is a linear regulator and the only other part use for 12 volts is to energize the coil of the relay. I have a 5 volt relay on order, it is the same size as the 12v relay and even has the same pin out.
It sure would be nice to get the power consumption down to the point where the unit can be battery powered….by using the microprocessor for power management. But, I do not see how to vary the clock frequency of the built in silicon timebase of the microprocessor. Without the source code, is there any way to reduce the microprocessors clock frequency?
Hi Guys
i just baught W1209
when I inplug the thermostat, all setting are loosing. Whta shall I do?
please help. I have tried many times but same.
please
rgds
Salim
I just want to ask how to power the w1209 thermostat? The adaptor should be 12v right? But how about the ampere of the adaptor? Some 12v adaptor are 1a, some are 1.5 a and some are 2a. How should I choose the right one? What 12v adaptor should I use? Is it the 1ampere or 2 ampere? I need help please. As soon as possible. Thank you.
I have a w1209 which mostly works fine. My cooling set point is 6.5°C for a 12v cooler. My hysteresis is 1.0°C so the cooling relay should come on at 7.5°C and turn off again at 6.5°C.
The problem is that after turning off at 6.5°C and the cooler starts to warm up again, there are momentary temperature readings of either 21.9°C or 27.0°C. Unfortunately they are of a long enough duration to turn on the relay again even though the actual temperature is only say 6.8°C. This, of course, completely ruins the control of the cooler which essentially now runs continuously.
I did try increasing P5 to 3 so that it would not start the cooler until after 3 minutes from the last stopping but that did not prevent the incorrect temperature input from wrongly starting the cooler again by turning on the relay.
Have you or anyone else seen this behaviour of very short duration (less than a second) incorrect temperatures which turn the relay on?
It is a pity that the hysteresis parameter cannot be set to zero (minimum is 0.1). If you want to stabilize the temperature of a slow reacting system, the hysteresis is a waste of time causing higher overshoot than necessary.
In addition: with the W1209 there are 0.2 degrees minimum between trigger temp and return temp if you set hysteresis to 0.1 degrees.
For instance, for a 20.0 degrees trigger temp, and 0.1 degree hysteresis, the switching temps are as follows:
H: switch off at temp rising to 20.1 degrees (not 20.0), switch on again when falling to 19.9 degrees.
C: switch on at temp rising to 20.0 degrees, switch off again when falling to 19.8 degrees (not 19.9).
I guess this has been done to rule out the possibility of instability of control, but under circumstances it is not ideal.
Simple question….Are we able to keep the fan(s) running once the set temp has been reached? is there an option/setting to not have them turn off once temp has been reached?
If not, does anyone know of such a controller that can do that?
It is possible to have a signal that indicates if it is working in C or H
This is important so that if you change P0 “Heat C / H” change the device to turn on
Been tinkering to make W1209 differential over room temperatures.
Seems that replacing the 20K fixed resistor with a 10k thermistor for colder temp: and replacing the single sense thermistor with 2 thermistors in parallel and a third in series as the hot sensor give a +or_2deg differential from 0 to 40c at least.
+5v—–10kthemistor—pin 3–10kthermistor___10Kthermistor____ 0V_
colder sensor |__10kThermistor|
ALL 3 are Warmer sensor
Hello mr. IVAN,
thanks for great information here. I’ve used my w1209 for 2-3 days and then one morning display stucked with 3 dash — . I’ve checked ntc prob is ok, P6 alarm is off and in room temperature there is no way to exceed alarm values. resetted many times with +- buttons. Is it possible to fix this problem?
In like with the set up the one I just order its p3 which signifies low temperature is stopping at 22.1C why is it so? And how can I restore it to 50C.
My w1209 stops working all together and displays the number ”8” and if I turn it off and on again, its back to normal for a while. Any idaes would be most welcome.
Adie
I purchased a set of 6. Five worked, one could not be programmed. I need them to turn on a low-voltage heater when temp falls to 0c (32-deg f)
The second set of 6 are all bad. One seemed to have a bad sensor, temp would not register accurately… drops until 7c and even when packed in ice will not continue to drop.
The other 5 all trip at 28c…. I want them to trip at 0c… can’t figure out why unless they are faulty


")
The Heating/Cooling instruction is wrong. When set to C the relay activates when the temperature RISES to the set temperature.
Look at the setup:
PO Heating or Cooling ?
Here we set the temeperature controller operation mode C- cooling , H-heating.
If you set Cooling (C) temperature controller will be activated relay when temperature falls to the setpoint.
If you set Heating (H) temperature controller will be activated relay when temperature raise to setpoint.
Wrong! James is correct: I use one for a freezer control unit (“C” mode), and when the temperature rises above -18 deg Celsius, the relay kicks on, the switch is closed, the compressor turns on, the evaporator coils cool, and the temperature in my freezer once again drops!
Hi, friends, One question, somebody have a link video to connect W1209, to Temperature Control in a mini fridge, Cheers
Exactly, I spotted that also right away. Instruction should read:
“If you set to Cooling (C), temperature controller will activate relay when temperature rises above the setpoint.
If you set to Heating (H), temperature controller will activate relay when temperature falls below setpoint.”
Simple: when you want to cool, something should start when it gets too hot; when wanting to heat, something should start when it gets too cold.
But besides this small detail, kudos to Ivar for this post – mine also came without instructions (but for that price, who can complain?).
Does it keep the set values in memory when 12v power is removed?
So if 12v power supply comes from solar panel it will come and go.
Will this device work as set when power returns?
Yes have memory for settings … if you disconnect from power all setings is save
Easy mounting upgrade:
I removed the terminal strip, the thermal sensor connector and the relay. I then turned the board over and
placed the relay over and marked where to drill the hole to allow the relay to be mounted on the back of the
board, scrap the coating off the front of the board around the new hole , set & solder the relay, the terminals
and the sensor connector. Now you have nothing taller than the switches & display on the front of the board.
What I want to know is , what is the function(s) of the four solder pads just to the left of the display.
It appears to be for a connector, One is ground the other three go to the microprocessor (extra switches/ functions?) Is it possible to download the code from the chip, or even change it?
The pads are the programming interface for the STM8F003 microcontroller (8K Flash, 1K RAM, 128Byte EEPROM). By the way, all the development tools are free, and WS1209 is maybe the cheapest complete microcontroller board on the market today.
I traced the connections of all the components of the PCB. With this data it should be simple to write a new firmware for the STM8S003F3.
http://pastebin.com/xwx4QK7m
Thomas, you could have saved yourself the trouble. Here is the circuit 🙂
http://images.ua.prom.st/203440504_w640_h2048_w1209_shema_el__ipialnaya..jpg?PIMAGE_ID=203440504Edwin, this appears to be the/a source of the information:
http://electrik.info/obzor/968-elektronnyy-termostat-w1209-s-aliekspress.html
Hello,
what I’ve seen :
If I number from top to bottom
Pin 1 is the GND
Pin 2 got to pin 4 , ic STM8S003F TSSOP20 = NRST Reset
Pin 3 go to pin 18, ic STM8S003F TSSOP20 = PD1/SWIM Interface to Debug or Programming
Pin 4 go to +5Vdc.
It seams to be the programming connector. I’ve also tried to find the source code, but without success up to now. Would be interesting to have a personal setting that allow to have controller from 0 to 999°C for example or regarding different sensor type.
Bricola, by convention, “pin1” is the square pad (and that’s +5V, check my pastebin snippet). I also described the analogue input network. With an NTC you’re limited to -50 to +150 degree, but the resolution and accuracy will be limited by (the lack of) analogue signal conditioning, no voltage reference, and the low-spec 10 bit ADC.
I doubt that you’ll find source code, but hacking is fun – roll your own.
i use this equipment as thermosat of radiator fan .
i set temp at 80
at the beginning, it work well.
but now lcd displaying — and relay activated. it didnt change even temp down to 26.
when P0 set to “H”, and relay not activated but lcd still displaying — .
whats going on?
Maybe you have activated alarm or bad temerature controller
I need to check the temperature for XX min ( say 20 min ) and if the Temp didn’t reach to the set value in XX min ( say 20 min ) , i need to operate a heating element .
I found the online instructions for this board a bit confusing.
When you power on the board, it displays the current temperature. Press the SET button to set the temperature at which the relay will switch on.
In addition to simply setting the temperature at which the relay turns on your device, you can set nine parameters that are not apparent to a casual user. These are labeled P0 through P8. To access these options, press and hold the SET button for 5 seconds.
Code Indication Set range Inital Setting
P0 Cooling/Heating H/C C
P1 Hysteresis 0.5-15℃ 2
P2 High limit 110℃ 110
P3 Low limit -50℃ -50
P4 Temp. adjust -07 to 7℃ 0
P5 Delay start time 0 -10 min. 0
P6 Alarm on/off on
P7 High temp. alarm 0 -110 ℃ off
P8 Initial setting on/off off
Detailed instructions:
Press SET for 5 seconds to enter the main menu settings.
Press the + or – button to cycle through registers P0 – P8.
Press SET again to view the stored value.
Press + or – to change the stored value.
Press SET again to save the new value and return to the P0-P8 list.
The controller will return to normal mode if no button is pressed for 10 seconds.
P0 – Sets cooling vs. heating mode.
– In cooling mode, the relay engages when temperature rises past the set point.
– In heating mode, the relay engages when temperature decreases past the set point.
P1 – Hysteresis (return difference)
– Hysteresis is the difference in temperature between when the relay engages and when it shuts back off.
– This keeps the relay from constantly cycling on and off with small changes in temperature.
Example: You want to turn on a fan when the temperature rises above 30 degrees. If Hysteresis was set to zero, the fan would come on at 30C, turn back off at 29.9C, and then back on at 30C – constantly cycling your load. With hysteresis set to 2, the fan will come on at 30C, turn off at 28C, and then come back on again at 30C. This gives your fan a chance to adequately cool the device you are measuring.
In heating mode, the fan would come on at 30C, turn off at 32C, then on again at 30C.
P2 – Maximum temperature a user is allowed to set.
P3 – Minimum temperature a user is allowed to set.
What confused me in the Chinese instructions:
P2 and P3 do NOT set the relay control point. These parameters set the temperature limits displayed to your end user when they press the SET button. This lets you limit the temperature range your end user can control.
For example, you may want to limit your end user to only control the temperature of a cooler between 0C and 10C. Set P2 to 10 and P3 to 0. When your end user presses the SET button, they can only change the setpoint between 0 and 10.
P4 – Temperature correction/calibration
Use this to correct the temperature displayed by this unit when compared to a calibrated thermometer of known value. This setting can usually be left at the default value of 0C. An offset of -7C to +7C can be applied to the displayed temperature value.
P5 – Delayed start time. Unit = minutes from 0 to 10. Set to 0 to disable.
Delay relay operation on initial power-up by this number of minutes. This can help provide time for compressor delay, temperature stabilization, etc.
P6 – Key tone switch (Note: This setting does not work on my W1209 Ver 1.2)
P7 – Temperature alarm
On units with a buzzer, this setting triggers an audible alert. In cooling mode, the alert sounds when the measured temperature is at or below the value set in P7. In heating mode, the alert sounds when the measured temperature is at or above the value set in P7.
P8 – Restore factory settings (Not working on my W1209 Ver 1.2. Toggles between C & H)
At “OFF” state(before powering), Long press + -,start and then it goes to factory setting
Thanks for the informative post Bob.
Recently the radiator fan speed controller in my car toasted.
The replacement part is $US 400.
I looked for alternatives and found w1209 as a good one.
I made the following settings for cooling system to start working when temp crosses 80°C :
I set operaring temp – 80
p0 – C (cooling)
P1 – 2.0
p2 – 85
p3 – 0
p4 – 0
p5- 0
p6 – off
P7- 82.5
p8 – C
I want to use it to switch on car radiator fan at 80°C
When temp of sensor reaches 80 the red display starts showing 3 dashes ( – – – )
Where did I go wrong ??
Reply
wed your post
three dashes is —- activated alarm maybee on P7 can set higher temperature
@Thomas @edwin
I want to modify the source code so that P5 will set(also) the delay between Relay OFF and ON.
I have seen the pin configurations, but not able to find help on how to download, modify and upload the source code to STM8.
@GukolMC
The W1209 firmware is read protected. Even if you could read it there is no source code in the chip, only machine code. Maybe you find a website in China where you can download the source code, but I don’t think so. Your best option is to write a new software.
Here is a starting point:
https://hackaday.io/project/16097-eforth-for-cheap-stm8s-value-line-gadgets
please, I wonder if I can use 220v 100w light bul but on this thermostat.
yes you can use this 220v 100w light bulb
sir,
I purchased XH-W1209 with display and probe from ebay.in. In my module only P6 programs are there.
It does not have speaker or buzzer..
P6 is working .
Now I need your help,
how and where to connect buzzer?
One more advice needed .
can i increase the probe length and do the calibration using program (P4)
yes
I’d like to get the measured temperature data and send it to Arduino or an IoT platform (ie. Thinger.io).
Recent modules bought have only P0-P5 – thanks for all this useful data…
The relay in current units I got is a normally closed contact – contacts close on loss of power or over/under temperature settings [register LLL or HHH on display]. Units work well with P0-P5 settings… NC contact was a surprise as when relay actuation light is on the contacts are OFF.
nice controller , i play with them now
dear sales group
Good moorning
we’re so happy and pleased to send this e-mail to you , and it is a great honor to communicate and deal with you .
we need good temperature control model w1209.
we’d like to receive detailed prices to Egypt .
we’ll get one instrument of your products as a demo .
we’ll experience and test these instruments in Egypt .
If we found your products are good , work efficiently and have quality assurance , we’ll advertise these products and instruments in our country Egypt and other neibouring countries which we deal with .
If that , we ‘ ll import your products and open the door of trade dealing with you .
To conclude , we want to say we hope to cooperate and communicate eachother . That’s all for now ,
thanks
Sales manger
00201110049577
Can anyone tell me if the unit will be ok on 13.8V ?
What is safe input range ?
Got one at 12,5v and got blown. Maybe a fluke, but set other ones with a dc step-down to 11,5 for safety, now working acceptably
My w1209 has been running on 14.63 DC (transformer says 12vDC) for couple weeks now with no issue’s.
my controller’s display is not showing any thing and the relay is ON. this happened after it exceeded high temperature. I had reset the power many times but I cant see the display . Is there any hard reset system for this unit.
Hi maybee is set temperature alarm on
P6 – is value for this type temperature controller
controller showing on display: —
Thank you for posting. I am looking at the electrical diagram. I understand we are using to 12 volts to power and we are turning on a relay (as indicated by the LED) depending on if we have it for C and temp gets higher or we have it set for H and the temp gets colder. Can you go into a little more detail on K0 and K1? Thanks Tom
Temperature controller close (and open) K0-K1 terminals
if you have C if reach critical high temperature k0 and k1 terminal close = start refrigeration
if you have H (heating) reach critical low temperature k0 and k1 close = star heating
Never mind I figured it out
Thanks,
Tom
Is there anyway to increase the max temperature from 110C? I have an application that would need an upper limit of about 200C.
Hello dear Ivan, first of all, I would like to thank you for this magnificent complete guide and for the time spent in preparation of the guide. All this for shared with us (the world) so thank you again for sharing. I ordered a model W1209 for a small beverage fridge, thermoelectric semiconductor, nominal voltage: 220V – Nominal input: 60w – Nominal frequency: 50Hz – Storage volume: 20 L. My question, Installed the W1209 to replace Manual thermostat button? Thank you in advance and I apologize for the inconvenience of my adventures, thank you.
The thermostat has a memory if you remove the buttons the settings remain stored. But if you want to move the buttons, the soldering is difficult, the circuits are corrupted .. I propose to connect the wires to the buttons and then connect them where you want
Attachment
Hi Ivan, The translator has mal translated my request, sorry, I wish as you say connect the wires to the buttons, then connect them to the fridge, here is a photos of the manual thermostat,
Attachment
I’ve seen buyers of W1209 or XH-W1209 used a SSR 25 or 40A relay, I bought 1 pieces if needed for mounted on fridge.
Attachment
And finally I own an adapter from 3 to 12V I do not know if I would need?
Sorry i cannot help with thermostat .. from fridge
But in
in SSR relay can switch more load (curent) , if you feeding (control 4 and 3 ) from this transformer and regulate by xh-w1209 relay switching..
Thanks for the info Ivan, during the purchase of the W1209 I noticed the different notes on the relays, I do not know if identical just the notes that changes? I ordered 3 cheap. Thank you again for all the advice and help, I’m talking about your site in France, very appreciate, thank you.
Attachment
Here is a picture of the relays of 3 thermostats purchased.
Thermostats are manufactured by several factories, over 5 Amps I would consider over the solid state relay, especially if they frequently switch and switch off
Thank you Ivan for its precisions, finally I will use a thermostat MH1210W for the refrigerator, I think more suitable, just one last issue, Ivan, to power the W1209 requires an adapter, that is ok, I see indicated on the relays Of the W1209 in general 20 Amperes, can I use a socket (max 220v 5 amperes) and powered hot or cold without transformer or relay ssr …? Example I plug the power supply 12V of the W1209 and use K1 and K2 to install a small 12V fan with red and black fan cable? Thank you Ivan.
MH1210W – is good choice
Xh-1209- can use for fan ..
220V 5A You do not need to use the ssr relay.
Dear Ivan, you are a generous man, fabulous, thank you for all, your guides are perfect, I wish you all happiness, thank you and great respect IVAN, great greeting of France.
Attachment
Hello from France, dear Ivan, I wanted to share the result, it works perfectly, I have the model from P0 to P8, the other 2 are P0 to P6, so in the end its walk very well, thank you and happiness for you.
I make new manual for P0-P8 but need more time , this version XH-1208W is little different
Hello Ivan, your presentations and instructions on electronic products are very appreciable, thank you for all this long and precise work, I look forward to your guide W1209 P0-P8 and thank you very much in advance.
Hi. I could not understand the translation from the chinese manual. All I need is to have the relay activated when the temperature reaches 55° and deactivated when it drops 45. Can you help me?
U muss simulate on my xh-w1209 temperature controller , but you setings P1 -C cooling and P2 set 10C.. please check..
Attachment
Dear Ivan, thanks to your precious explanations I managed the assembly of the W1209 with a fan, I wanted to use another W1209 to power a 25W lamp, I drew a personal diagram for my understanding, the brown wires are the phase or The (Line) and the blue neutral, according to you, is my schema acceptable? Thank you in advance.
Yes is schema is good , good luck 🙂
Attachment
This mission accomplished, very good functioning, set on H for the warm works perfectly, the assembly was carried out on a W1209 P0 / P6, I remain integrated in a box and it is OK, thanks to you IVAN, very very large Respect IVAN thanks.
I happy for this .. good luck
I thank you with all my heart, you are a genius, great respet and great hello of France, that your wishes realizes, that happiness is with you, thank you Ivan, very good weekend.
Attachment
Hello Ivan, I hope that sava for you, I apologize for disturbing you but I can not find a solution, I had the idea to use a W1209 to control (if possible) a 2-channel relay module that Is powered 5V and has 2 output of 220V 10A, according to your knowledge of expert, would it be possible to control this module with the W1209? If OK, I would like to connect 2 sockets to control the temperature with the W1209 and activated or not the module in 5V so that the module actuates the relay (s) that actuates the refrigerator and a fan? It is a dream of amateur, if impossible to use the W1209 to control the module, I let fall my amateur idea, excused me disturbed you with my stories, thank you for giving me your opinion ‘For me) and thank you again for all your sharing
Hi Beckert , yes if w1209 give 5V to relay, can you source 2 channel relay module ,, but muss remove relay from pcb W1209 , this week i will test simmilar version of this temperature controlle i test it.. .
Hi evan pliz can you help me with the wiring of xh w1209 to a 12v heater and a 12v small fan. Where does ko and k1 connect to since the heater and the fan have only two wires the positive and negative which i will connect to the 12v power supply
Attachment
hi vukani im make schematic with fan a heater controled by xh-1209
Hello dear IVAN, thank you very much for your help of expert, you are a Genius IVAN, during my research I discovered the Arduino and I really appreciated this multiprogramme machine for ease use with relay, sensor, screen with But the MH series do very well the work and the program is already included, I think the idea of using The relay module with PCB W1209 is very good because no headache to realized a programming, all is already OK.Have the intelligence of deleted the relay of the W1209 to directly control the module is a genius intelligence, you are this genius IVAN , Thank you for sharing, I wish you good health and happiness, great thanks and respect
Attachment
Hi, I’m having an issue with my w1209. I used this wire config and hooked it up to a fan, when it reached the temp it pulses on and off. I’ve played around with the settings and can’t seem to figure out what the problem is. Can someone help?
I set operaring temp – 85
p0 – C (cooling)
P1 – 2.0
p2 – 110
p3 – 80
p4 – -3.8
p5- 0
p6 – off
Sorry, that’s actually the wrong image diagram. I used that config minus the heater.
Sorry that’s actually the wrong image diagram, I used that config minus the heater.
What is the load requirement of your fan/heater? Is your transformer able to provide needed amps? just a note, on your sensor calibration (p4) is it off that far? I used an old sensor had around and its off only -0.2. try unhooking terminal KO and see if it trips. Good luck.
I don’t know what is wrong, but my w1209 not switching, led is of. I set everything in different ways. I have version with p0-p8.
I’m very concerned about the lack of function. Beckert says (on July 11, 2017 at 7:03 pm), that P7 and P8 are no longer included. I hope this is an error::>
I speak fluent hardware, but don’t do programming-although I can see the usefulness of the unit as a development platform.
35mA at 12DC is a lot of current. With the LED’s and the relay inactive, why does it use 35mA?? Shouldn’t it be closer to 35uA?? I understand the microprocessor has to do some real work because it has to constantly read the resistance of the temperature sensor…..but shouldn’t the unit wake up, check the temp sensor and then go back into deep sleep until it’s time to check the temperature again??? The vast majority of users could use the device if it only took one temperature reading in 30 seconds-so why waste the power?
I use mine to monitor and regulate the temperature of my cannabis nursery, and I can definitely get by with a single temperature sensing every 1 or 2 minutes.
Also, the unit shouldn’t have 12 volts applied because the 5 volt regulator is a linear regulator and the only other part use for 12 volts is to energize the coil of the relay. I have a 5 volt relay on order, it is the same size as the 12v relay and even has the same pin out.
It sure would be nice to get the power consumption down to the point where the unit can be battery powered….by using the microprocessor for power management. But, I do not see how to vary the clock frequency of the built in silicon timebase of the microprocessor. Without the source code, is there any way to reduce the microprocessors clock frequency?
Sorry for being so long winded::>
Attachment
When power on 110 temperature not change? pls help factory reset option or author solution ?..
Attachment
Hi my w1209 cannot store the settings when the power cut off its automatically reset to default and it has no c5 capacitor
Hi Guys
i just baught W1209
when I inplug the thermostat, all setting are loosing. Whta shall I do?
please help. I have tried many times but same.
please
rgds
Salim
Mine does not keep the values on memory :-(.
This temperature controller have memory , but is many producers i test new in march 2018 … and test memory setings..
I just want to ask how to power the w1209 thermostat? The adaptor should be 12v right? But how about the ampere of the adaptor? Some 12v adaptor are 1a, some are 1.5 a and some are 2a. How should I choose the right one? What 12v adaptor should I use? Is it the 1ampere or 2 ampere? I need help please. As soon as possible. Thank you.
Hi adaptor with 1A is much good xh1209 have little power draw 40mA..
Great info, of course it has to be sicne there’s no simple manual with the device…
BUT, my problem is that I set the max temp and when that temp is reached, the relay doesn’t switch, it just displays HHH on the display.
If I switch it to ‘heat mode’ under P0, it immediately turns on the relay, and it switches OFF, when I hit the high temp I have set.
To me that seems to indicate I am NOT understanding something????
I am hoping to use this with a solar panel/battery and a 12v fan in my chicken coop to pull the hot air out on the particularly hot days…
Any recommendations are appreciated!
HHH is for alarm when temeprature exceed you goal value , check y P6 – menu
W1209 plz ic no send me
For w1209 Can we change 110v relay to 220v please some one help me
can i use this as a radiator fan switch? can you give me an instruction on how to perform it if possible. Thank you!God Bless!
I have a w1209 which mostly works fine. My cooling set point is 6.5°C for a 12v cooler. My hysteresis is 1.0°C so the cooling relay should come on at 7.5°C and turn off again at 6.5°C.
The problem is that after turning off at 6.5°C and the cooler starts to warm up again, there are momentary temperature readings of either 21.9°C or 27.0°C. Unfortunately they are of a long enough duration to turn on the relay again even though the actual temperature is only say 6.8°C. This, of course, completely ruins the control of the cooler which essentially now runs continuously.
I did try increasing P5 to 3 so that it would not start the cooler until after 3 minutes from the last stopping but that did not prevent the incorrect temperature input from wrongly starting the cooler again by turning on the relay.
Have you or anyone else seen this behaviour of very short duration (less than a second) incorrect temperatures which turn the relay on?
Mine does the same. No idea why.
Can someone show me examples of the settings for both Heating and Cooling?
For Heating I want it to turn on at 0 degree or below and then turn off when it reaches 2 degree.
For Cooling I want it to turn on at 30 degree or above and then turn back off when it drops to 28 degree
thanks in advance! By the way this is for my Greenhouse and it turn on my Geothermal system.
It is a pity that the hysteresis parameter cannot be set to zero (minimum is 0.1). If you want to stabilize the temperature of a slow reacting system, the hysteresis is a waste of time causing higher overshoot than necessary.
In addition: with the W1209 there are 0.2 degrees minimum between trigger temp and return temp if you set hysteresis to 0.1 degrees.
For instance, for a 20.0 degrees trigger temp, and 0.1 degree hysteresis, the switching temps are as follows:
H: switch off at temp rising to 20.1 degrees (not 20.0), switch on again when falling to 19.9 degrees.
C: switch on at temp rising to 20.0 degrees, switch off again when falling to 19.8 degrees (not 19.9).
I guess this has been done to rule out the possibility of instability of control, but under circumstances it is not ideal.
Hi Ivan/all,
Simple question….Are we able to keep the fan(s) running once the set temp has been reached? is there an option/setting to not have them turn off once temp has been reached?
If not, does anyone know of such a controller that can do that?
thanks
XH-W1209 when reach target temperature – Open relay
If is higher (higher as set hystery) temperature controller cloese relay..
No maybe you need temperature controller with two relay output , one for “devive” and one for “fan”
without power how will be reset and what indicates goes factory setting.
It is possible to have a signal that indicates if it is working in C or H
This is important so that if you change P0 “Heat C / H” change the device to turn on
Been tinkering to make W1209 differential over room temperatures.
Seems that replacing the 20K fixed resistor with a 10k thermistor for colder temp: and replacing the single sense thermistor with 2 thermistors in parallel and a third in series as the hot sensor give a +or_2deg differential from 0 to 40c at least.
+5v—–10kthemistor—pin 3–10kthermistor___10Kthermistor____ 0V_
colder sensor |__10kThermistor|
ALL 3 are Warmer sensor
Hello mr. IVAN,
thanks for great information here. I’ve used my w1209 for 2-3 days and then one morning display stucked with 3 dash — . I’ve checked ntc prob is ok, P6 alarm is off and in room temperature there is no way to exceed alarm values. resetted many times with +- buttons. Is it possible to fix this problem?
fail temperature connector or circuit 🙁
In like with the set up the one I just order its p3 which signifies low temperature is stopping at 22.1C why is it so? And how can I restore it to 50C.
My w1209 stops working all together and displays the number ”8” and if I turn it off and on again, its back to normal for a while. Any idaes would be most welcome.
Adie
I purchased a set of 6. Five worked, one could not be programmed. I need them to turn on a low-voltage heater when temp falls to 0c (32-deg f)
The second set of 6 are all bad. One seemed to have a bad sensor, temp would not register accurately… drops until 7c and even when packed in ice will not continue to drop.
The other 5 all trip at 28c…. I want them to trip at 0c… can’t figure out why unless they are faulty
Can this also work with Input voltage: DC 6 V
My ventilation system works on 6 Volt
Thanks